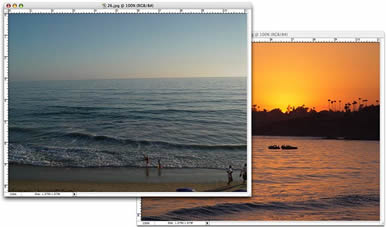
Open the image that you want to work with and also open any image of a sunset.
Choose Image>Adjustments>Match Color
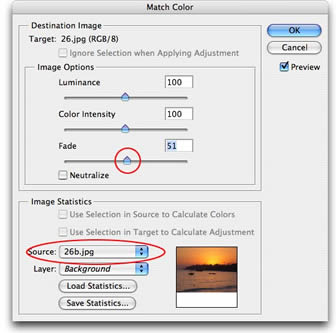
The Match Color dialog box will open. We will only need to use 2 settings for the task at hand.
Under Source, click the drop down menu and select the image of the sunset. There will be a thumbnail for you to check that you have selected the correct image.
Turn on the preview option if it isn’t already. The working image will now take on the color attributes of the sunset image. Most probably the effect will be a bit too much.
Adjust the Fade slider until you are happy with the result. Move it to the left for more of the inherited color and to the right for the original color.
Luminance can also be adjusted if you see differences in the brightness of the images.
This tool can also be used when compositing multiple images in a layered document, where you will select the name of the layer the layer option.
When you are satisfied, click the OK button to apply the changes. There are many things that can be done with this new filter including using the match color to remove a color cast in a single click.

For more cool techniques like this on an easy to follow video format check out Photoshop Secrets For Digital Photographers

This site uses Akismet to reduce spam. Learn how your comment data is processed.

Here is a tutorial that you can use for layered collaging. While it might be easier to use a layer...
How to use the new Neural Filters in Photoshop 2021. Change the age or expression on a face and more....
How to access and use ai Reflection removal to remove reflections from photos in camera raw in photoshop....


Great and quick tutorial for a super effect – Thanks.